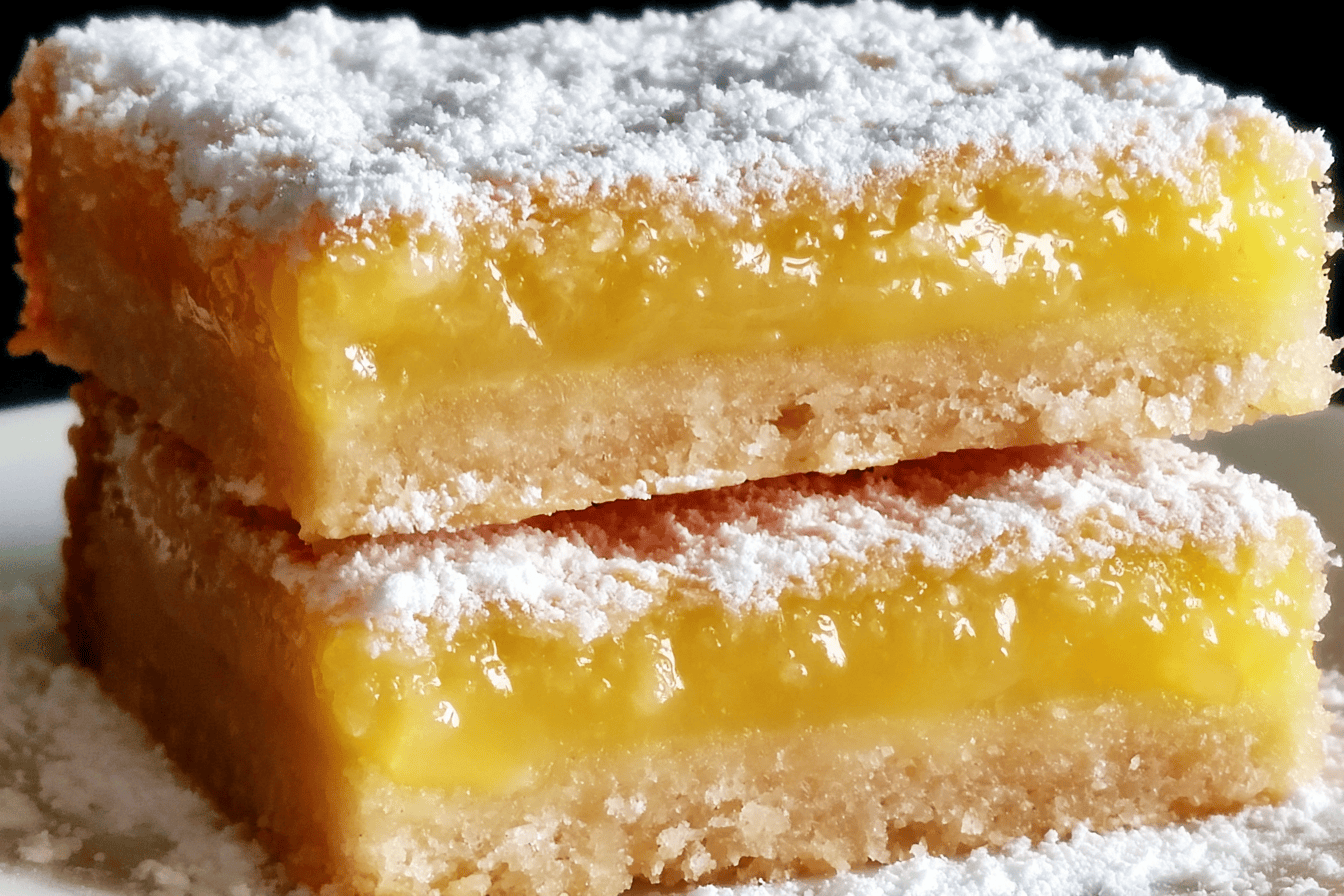
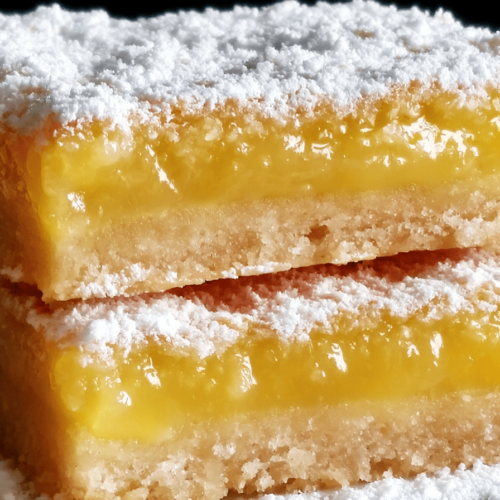
These Classic Lemon Bars are the dessert I’m known for among my friends, and one bite will show you why. Picture a buttery shortbread crust topped with a bright, tangy lemon filling, all finished with a snowy dusting of powdered sugar. They’re perfectly balanced: sweet but not cloying, with a creamy, luscious texture when done right. Better yet, they come together with just five pantry staples in about an hour of hands-on time. So whether you’re baking for a potluck, a bake sale, or a sunny afternoon at home, these bars deliver. Let me show you exactly how to make them.
Table of Contents
Why You’ll Love These Classic Lemon Bars
First, they’re beautifully balanced, since a little salt in both layers keeps them from being too sweet. Next, they pack serious lemon flavor, because you infuse the sugar with fresh zest. Plus, they use just a handful of simple ingredients you likely already have. And of course, they’re a guaranteed crowd-pleaser, converting even self-proclaimed non-dessert people. Best of all, they’re make-ahead and freezer friendly, so they fit any schedule. In short, they’re everything a lemon bar should be, with a few smart tweaks that take them over the top.
The Secret to the Best Lemon Bars
Over many test batches, I learned that a couple of small details make all the difference. First, I aim for a crust-to-topping ratio of about 1:3, which gives you plenty of that dreamy lemon layer. Next, I rub fresh lemon zest into the sugar for the crust, which carries bright citrus flavor through every single bite. Finally, I add salt to both the crust and the filling to temper the sweetness. Because of these tweaks, the bars taste balanced and vibrant rather than one-note sweet. In other words, the little things matter here.
Ingredients You’ll Need
Here’s everything that goes into these bars, measured in US standard amounts. This recipe fills a 9×9 pan and makes 16 bars.
| Layer | Ingredient | Amount |
|---|---|---|
| Crust | Finely grated lemon zest | 1 Tablespoon |
| Crust | Granulated sugar | 1/4 cup |
| Crust | Unsalted butter, room temperature | 12 Tablespoons |
| Crust | Kosher salt | 1/2 teaspoon |
| Crust | All-purpose flour | 1 3/4 cups |
| Filling | Large eggs, room temperature | 4 |
| Filling | Finely grated lemon zest | 1 Tablespoon |
| Filling | Freshly squeezed lemon juice | 3/4 cup |
| Filling | Granulated sugar | 1 1/2 cups |
| Filling | All-purpose flour | 1/3 cup |
| Filling | Kosher salt | 1/2 teaspoon |
| Serving | Powdered sugar, for dusting | as needed |
How to Make Classic Lemon Bars
The process comes together in two main stages: crust, then filling. Read through once, and then let’s start baking.
Step 1: Make the Shortbread Crust
First, heat your oven to 350°F and line a 9×9 pan with two sheets of parchment, creating a sling that hangs over all sides. Then combine the zest and 1/4 cup sugar, rubbing them together with your fingers until fragrant. Next, add the butter and salt, and beat until creamy, about 2 minutes. After that, add the flour and beat just until fine crumbs form. Finally, press the dough into an even layer in the pan.
Step 2: Par-Bake the Crust
Now, bake the crust until it’s light golden-brown around the edges, about 15 to 22 minutes. Meanwhile, get started on the filling so it’s ready the moment the crust comes out. Because timing matters here, having the filling prepped and waiting is key to success.
Step 3: Make the Lemon Filling
While the crust bakes, whisk the eggs in a medium bowl until beaten. Then add the zest, lemon juice, sugar, and salt, whisking until smooth. After that, sift the flour over the top and whisk again until fully combined. Because the flour acts as a binder, it helps the lemon layer set up beautifully.
Step 4: Bake and Chill
As soon as the crust is ready, immediately pour the filling over the hot crust. Then bake until the filling is just set with a slight wiggle in the center, about 18 to 20 minutes. After that, let the bars cool on a wire rack for about an hour. Finally, refrigerate them for at least 3 hours, or overnight, until fully chilled and firm.
My Most Important Tip: Use a Hot Crust
If you remember one thing, let it be this: pour the filling onto the crust while it’s still hot. Because the heat from the crust and pan kick-starts the setting process, the lemon layer firms up evenly and quickly. As a result, you avoid that dreaded gloopy, undercooked middle. So don’t let the crust cool before adding the filling, and have everything ready to go. This single step is the difference between good lemon bars and perfect ones.
More Tips for Success
After making these countless times, here are a few more tricks I rely on:
- Use the parchment sling. It lets you lift the whole slab out for clean, easy slicing.
- Cut with a hot knife. Dip the blade in hot water and wipe it dry between cuts for tidy squares.
- Dust sugar last. Add the powdered sugar right before serving, or it will dissolve into the bars.
- Don’t stress over looks. A slightly imperfect top disappears under that powdered sugar.
Fun Variations to Try
While the classic lemon version is hard to beat, this recipe is easy to adapt. For instance, you can swap the lemon juice and zest for another citrus you love, like lime, grapefruit, or orange. Each one gives the bars a slightly different personality, so feel free to experiment. Alternatively, try a mix of citrus for a more complex flavor. So once you master the base recipe, the possibilities are endless.
Storing and Freezing Tips
These bars keep well, which makes them great for planning ahead. Because they store beautifully, you can bake them a day or two before an event. Store the bars in an airtight container in the fridge for up to 1 week. If you want to freeze them, wrap them in plastic, place them in a freezer-safe container, and freeze for up to 4 months. Then thaw in the fridge for about an hour, or at room temperature for 15 to 20 minutes, and dust with powdered sugar before serving.
Key Takeaways
- These Classic Lemon Bars pair a buttery shortbread crust with a tangy lemon filling.
- Rub zest into the sugar and salt both layers for bright, balanced flavor.
- Pour the filling onto the hot crust so it sets evenly, not gloopy.
- Chill at least 3 hours, then cut with a hot knife for clean squares.
- Dust with powdered sugar right before serving, and store or freeze with ease.
Final Thoughts
At the end of the day, these bars prove that a few thoughtful details can turn a simple dessert into something unforgettable. With a buttery crust, a bright lemon filling, and a couple of smart techniques, you get lemon bars worth bragging about. So the next time you need a sunny, crowd-pleasing treat, give these a try. Just be prepared for everyone to ask you for the recipe.
Now I’d love to hear from you! Did you make these Classic Lemon Bars, and did you stick with lemon or try another citrus? Leave a comment below, drop a star rating, and share your favorite twist so other readers can try it too.
Classic Lemon Bars
Ingredients
- 1 tablespoon finely grated lemon zest from 1 large lemon
- ¼ cup granulated sugar
- 12 tablespoons 1 1/2 sticks unsalted butter, at room temperature
- ½ teaspoon kosher salt
- 1 ¾ cups all-purpose flour
- 4 large eggs at room temperature
- 1 tablespoon finely grated lemon zest from 1 large lemon
- ¾ cup freshly squeezed lemon juice from about 5 large lemons
- 1 ½ cups granulated sugar
- ⅓ cup all-purpose flour
- ½ teaspoon kosher salt
- Powdered sugar for dusting
Instructions
- Arrange a rack in the middle of the oven and heat to 350°F. Line a 9×9-inch pan with two sheets of parchment paper positioned perpendicular to each other, hanging over all sides to form a sling.
- Combine 1 tablespoon lemon zest and 1/4 cup granulated sugar. Rub the zest into the sugar with your fingers until fragrant. Add the butter and 1/2 teaspoon salt, and beat until creamy, about 2 minutes.
- Add 1 3/4 cups flour and beat until fine crumbs form, 30 seconds to 1 minute. Press into an even layer in the pan.
- Bake the crust until light golden-brown around the edges, 15 to 22 minutes. Meanwhile, make the filling.
- Whisk the eggs until beaten. Add 1 tablespoon lemon zest, the lemon juice, 1 1/2 cups sugar, and 1/2 teaspoon salt, and whisk until smooth. Sift 1/3 cup flour over the mixture and whisk until combined.
- As soon as the crust is ready, immediately pour the filling over the hot crust. Bake until just set with a slight wiggle in the center, 18 to 20 minutes.
- Cool on a wire rack about 1 hour, then refrigerate at least 3 hours or overnight.
- Lift out using the parchment and cut into 16 pieces, dipping the knife in hot water and wiping dry between cuts. Dust generously with powdered sugar right before serving.