These Gluten-Free Brownie Bars stack everything irresistible into one decadent treat, and they’re surprisingly easy to make. Picture a fudgy gluten-free brownie base topped with creamy vanilla frosting, crunchy peanuts, and a chocolate–peanut butter cereal topping. Better yet, they start with a boxed gluten-free brownie mix, so the hard part is basically done for you. So whether you’re baking for a party, a bake sale, or a gluten-free friend, these bars deliver big flavor and serious wow factor. They’re rich, crunchy, and completely crave-worthy. Let me show you exactly how to make them.
Table of Contents
Why You’ll Love These Gluten-Free Brownie Bars
First, they’re wonderfully easy, since a gluten-free brownie mix does most of the heavy lifting. Next, they feed a crowd, because one batch makes 16 generous bars. Plus, they layer three different textures, so every bite is fudgy, creamy, and crunchy all at once. And of course, they’re a hit with everyone, gluten-free or not. Best of all, most of the time is hands-off cooling, so the active work is minimal. In short, they’re a decadent, crowd-pleasing dessert that looks far more impressive than the effort involved.
The Three Irresistible Layers
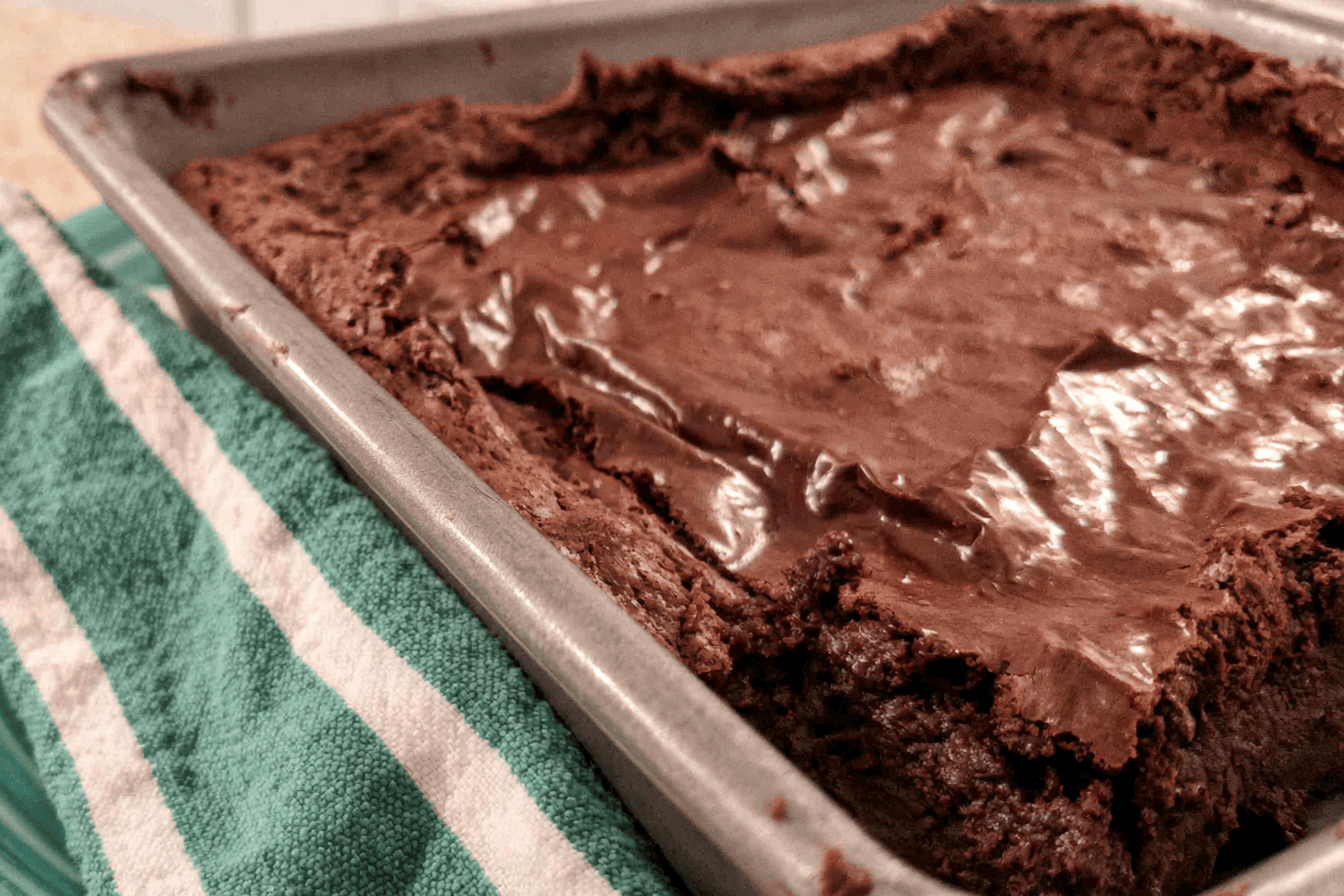
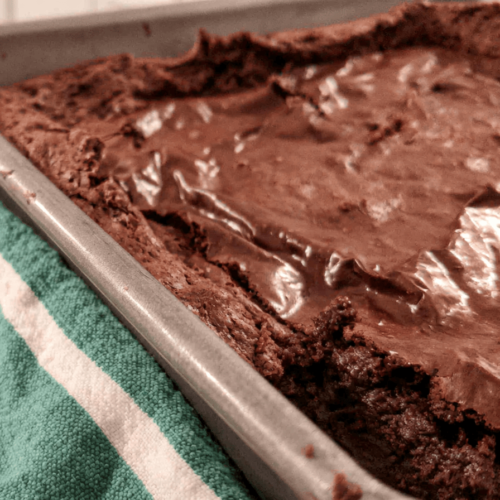
What makes these bars so special is their layered construction. At the bottom, there’s a rich, fudgy gluten-free brownie that forms a sturdy, chocolatey base. On top of that goes a smooth layer of vanilla frosting, sprinkled with salted peanuts for a salty-sweet contrast. Finally, a melted chocolate–peanut butter mixture is stirred with crisp rice cereal and spread over everything. Because each layer brings its own flavor and texture, the result feels indulgent and exciting. In other words, it’s a brownie, a candy bar, and a crispy treat all in one.
Ingredients You’ll Need
Here’s everything that goes into these bars, measured in US standard amounts. This recipe makes 16 bars.
| Component | Ingredient | Amount |
|---|---|---|
| Base | Gluten-free chocolate brownie mix | 1 box (16 oz) |
| Base | Butter and eggs (as called for on the box) | per box |
| Middle | Vanilla frosting | 1 cup |
| Middle | Salted peanuts, coarsely chopped | 1/2 cup |
| Topping | Semisweet chocolate chips | 1 cup (6 oz) |
| Topping | Creamy peanut butter | 1/2 cup |
| Topping | Rice cereal squares (gluten-free) | 1 1/2 cups |
How to Make Gluten-Free Brownie Bars
The process comes together in three simple stages. Just keep in mind that cooling time is built in, so plan ahead. Read through once, and then let’s get baking.
Step 1: Bake the Brownie Base
First, heat your oven to 350°F. Then make and bake the brownies as directed on the box, using the butter and eggs it calls for. Before you do, line your pan with foil and grease the foil on the bottom only, which makes removal so much easier later. After baking, let the brownies cool completely, about 1 hour. This full cooling is important, since a warm base would melt the frosting.
Step 2: Frost and Add Peanuts
Next, spread the vanilla frosting evenly over the cooled brownies. Then sprinkle the chopped salted peanuts across the top. After that, refrigerate the pan while you make the final layer. Because chilling firms up the frosting, it helps the topping sit neatly on top instead of sliding around.
Step 3: Make the Crunchy Topping
Now, combine the chocolate chips and peanut butter in a microwave-safe bowl. Then microwave on high for 1 to 2 minutes, stirring once, until melted and smooth. After that, stir in the rice cereal until it’s fully coated. Next, spread this mixture over the frosted brownies. Finally, let the bars cool completely before cutting, about 1 hour, then slice into 4 rows by 4 rows.
A Note on Keeping Them Gluten-Free
If you’re baking for someone with celiac disease or a gluten sensitivity, a little label-checking goes a long way. Because product formulas and ingredient sources can change over time, always read the labels on each ingredient to confirm it’s certified gluten-free. This is especially true for the frosting, chocolate chips, peanut butter, and cereal, since not every brand is safe. So take a moment to double-check, and you can serve these bars with total confidence.
My Best Tips for Success
After making these bars a few times, here are the tricks that make a real difference:
- Use a foil sling. Lining and greasing the foil lets you lift the whole batch out for clean, easy cutting.
- Cool completely between layers. Rushing causes melting and messy layers, so be patient.
- Warm a sharp knife. Running it under hot water and wiping it between cuts gives you tidy squares.
- Work quickly with the topping. Spread it before it sets so it goes on smoothly.
Fun Variations to Try
While the classic version is a knockout, this recipe welcomes creativity. For instance, you can swap the salted peanuts for pecans, almonds, or pretzels for a different crunch. Alternatively, use chocolate frosting instead of vanilla for an even richer bar. And if you’d rather bake from scratch, you can substitute your favorite homemade gluten-free brownies for the boxed mix. So feel free to make these bars your own.
Storing and Make-Ahead Tips
These bars are as convenient as they are delicious. Because they keep well at room temperature, you can make them a day ahead for a party or event. Simply store them tightly covered so they stay fresh and the topping stays crisp. If your kitchen runs warm, you can also keep them in the fridge, though the crunchy topping is at its best at room temperature. So bake ahead, cover well, and you’ll have a ready-to-go treat whenever you need it.
Key Takeaways
- These Gluten-Free Brownie Bars layer a fudgy brownie base, vanilla frosting, and a crunchy topping.
- They start with a boxed gluten-free brownie mix for an easy shortcut.
- Cool completely between layers so nothing melts or slides.
- Always read labels to confirm each ingredient is gluten-free.
- They make 16 bars and store well tightly covered at room temperature.
Final Thoughts
At the end of the day, these bars prove that an impressive gluten-free dessert can be genuinely simple to make. With a boxed brownie base and a few easy layers, you get a rich, crunchy treat that disappears fast at any gathering. So the next time you need a crowd-pleasing dessert that just happens to be gluten-free, give these bars a try and watch them vanish.
Now I’d love to hear from you! Did you make these Gluten-Free Brownie Bars, and did you stick with peanuts or try a fun swap? Leave a comment below, drop a star rating, and share your favorite variation so other readers can try it too.
Gluten-Free Brownie Bars
Ingredients
- 1 box 16 oz Betty Crocker Gluten Free Chocolate Brownie Mix
- Butter and eggs called for on the brownie mix box
- 1 cup Betty Crocker Rich & Creamy Vanilla Frosting
- ½ cup salted peanuts coarsely chopped
- 1 cup 6 oz semisweet chocolate chips
- ½ cup creamy peanut butter
- 1 ½ cups Rice Chex cereal
Instructions
- Heat the oven to 350°F. Make and bake the brownies as directed on the box, using the butter and eggs it calls for. Line the pan with foil and grease the foil on the bottom only for easier removal. Cool completely, about 1 hour.
- Spread the vanilla frosting over the cooled brownies. Sprinkle with the chopped peanuts. Refrigerate.
- In a medium microwave-safe bowl, microwave the chocolate chips and peanut butter uncovered on High for 1 to 2 minutes, stirring once, until melted.
- Stir the rice cereal into the melted chocolate mixture, then spread over the frosted brownies.
- Cool completely before cutting, about 1 hour. Cut into 4 rows by 4 rows. Store tightly covered at room temperature.